
When you order a Sprinter, there are loads of different options you can choose. Some make more sense for a conversion van than others. Some come in packages which are great value. Others come in packages where there’s little additional value at all (Mercedes branded flashlight, anyone?)
Here’s a list of most of the options you’ll care about, what they really mean, and whether they’re worthwhile having for a conversion van.
Most dealers will have pretty much no clue what an option does, or who it’s useful for. For instance, several people have let me know dealers told them to order the Aux battery because it would power their conversion. That’s not normally the case. Maybe the dealer was trying to be helpful, but unless they know what they’re selling, their advice isn’t likely to be very good.
Some dealers can’t (or won’t) order fleet-only options. Others have sufficient fleet business that they can slip those options in on a van for you. If you really need a fleet option, you might have to use an out-of-town or out-of-state dealer. That’s not a massive issue. Some will apparently even throw in a one-way plane ticket as an incentive to buy from them!
Go in to the ordering process prepared with good knowledge on what you do and don’t want. If you’re buying off a dealer’s lot, check the packages on the window sticker to be sure that you are getting the features you need. Better still, type the VIN number in to one of the sites listed on this page (if you trust it) to get the full list of build items on the vehicle. Even if a dealer says something’s included, do your own homework.
Where does this information come from?
This list is taken from the Sprinter configuration site and 2016 Dealer Ordering Guide. Now we have the 2018 Dealer Ordering Guide. The most useful document is the Special Equipment Handbook. This describes each option and provides pictures of most of them.
Some options might change over time. For instance, in 2016 Mercedes took away the ability to order suspension or swivel seats on most models because they added airbags to the driver and co-driver seats. We’ll try to keep this page up to date, but remember to always check with your dealer.
Basic van decisions
Before you get into choosing options, you need to know what basic vehicle you’ll be buying. Your four decisions are:
- Crew or Cargo or Passenger
- High roof or low roof
- 144 wheelbase or 170 wheelbase (or 170 EXT)
- 2500 (single rear wheel) or 3500 (dual rear wheel)
Assuming you’re planning on using this van as the basis for a conversion, it’s probably not worth getting the passenger version. Even if you want windows all around, you probably won’t want all the seats or a floor with seat mount holes in it. It’s also quite likely you’ll be removing and replacing some of the trim in the van.
You can get most of the parts of a passenger van as individual options on a crew or cargo vehicle. For instance if you really want the trim, F06 Interior Trim Package gives lower panel, window pillar and roof trim so you get the look of a passenger van but without the windows.
If you choose a cargo van, you’ll either have to cut and install your own aftermarket windows, or you can order W16 Window behind driver and W17 Window in sliding door. You can get windows all round if you really want them. Installing your own windows isn’t a terrible idea if you want ones that have vents in them. We’ve considered removing the factory window from our crew van to do this.
The other issue with a cargo van is that there are no captive nuts in the chassis members to add bench seats for rear passengers. If you’re planning on having a secure, DOT approved seat in the back, you would find it very hard to retrofit a Mercedes bench seat. People do add other seats, but the vehicle is still only classified as a 2-occupant vehicle.
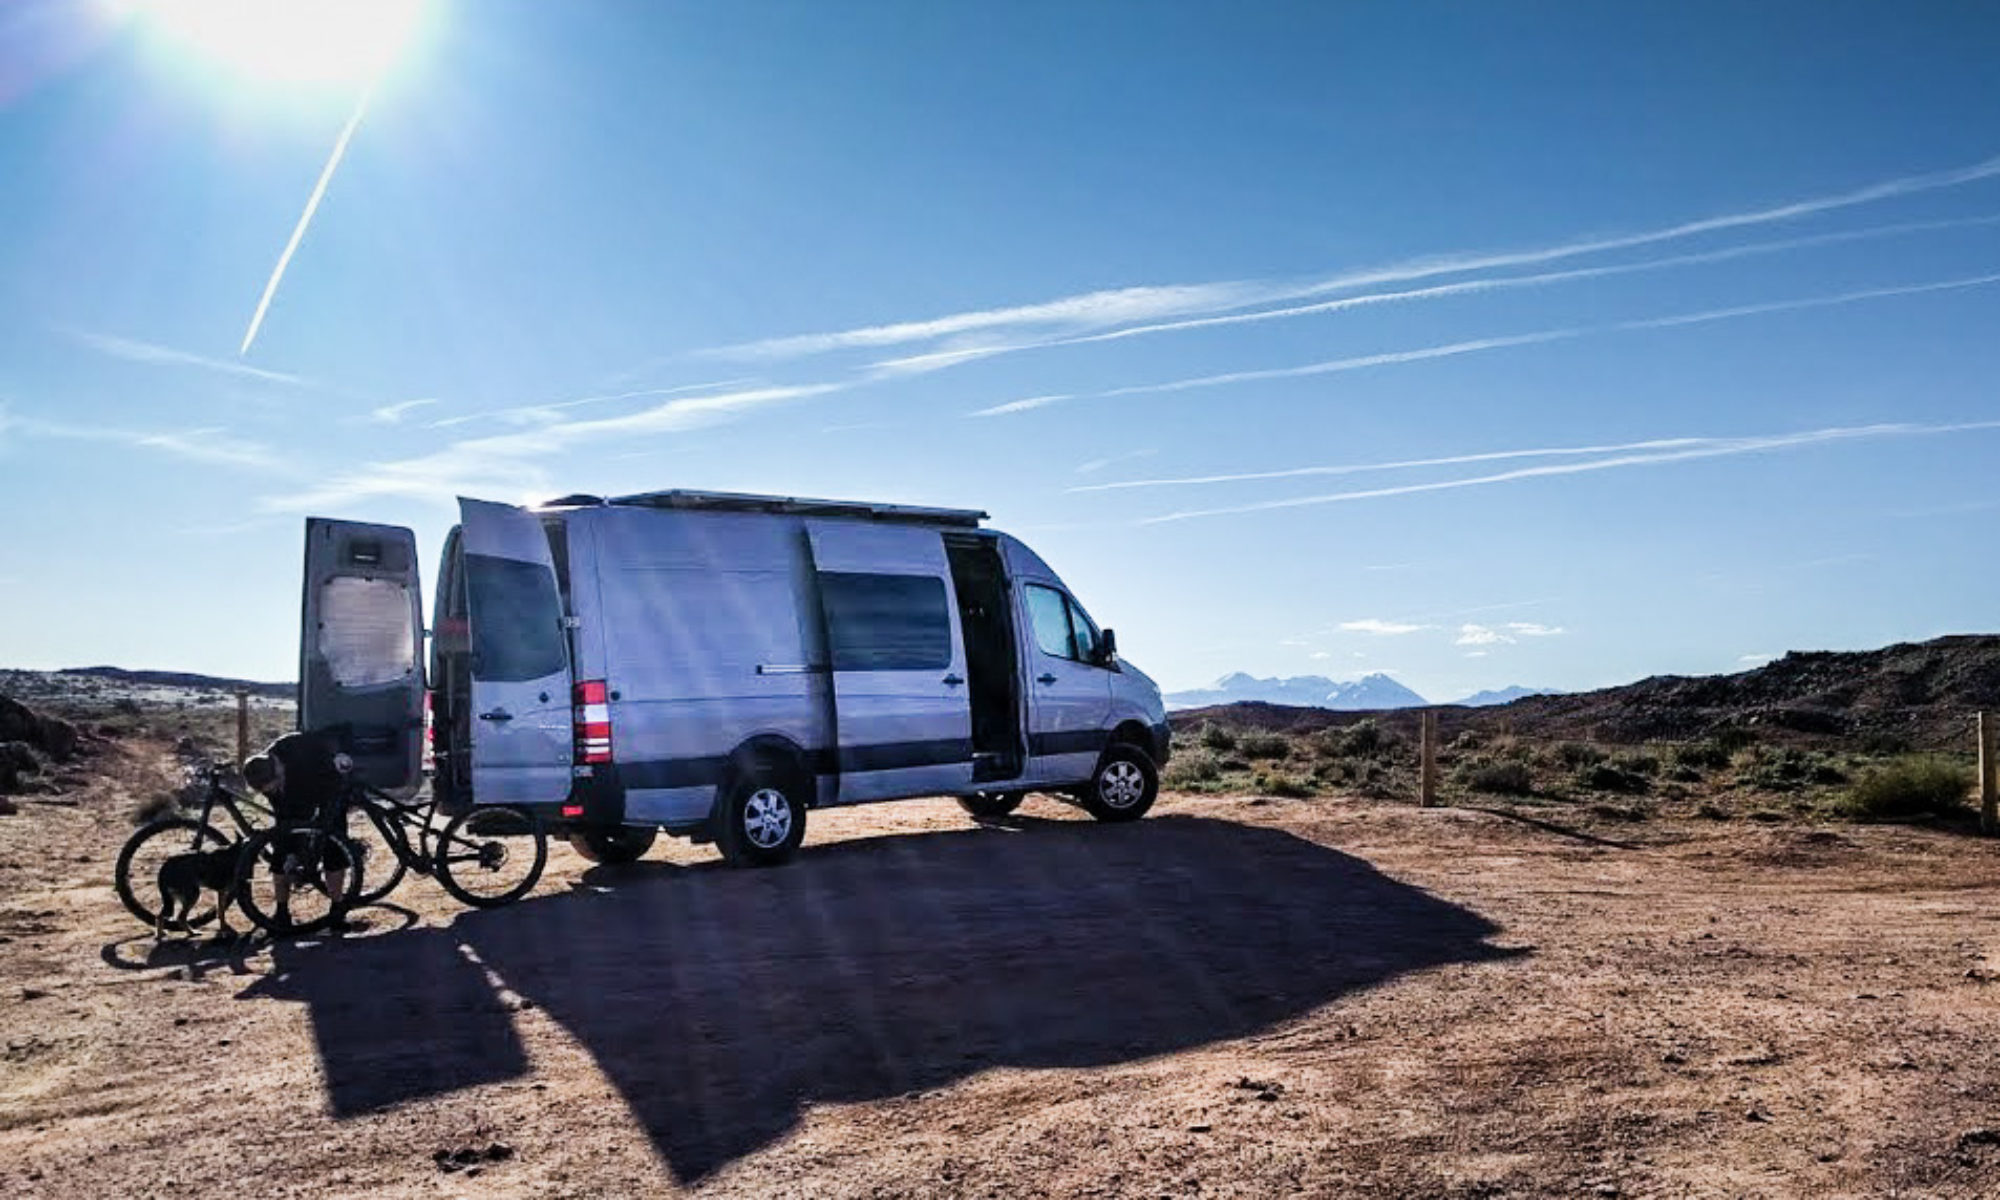
The typical conversion option is to choose the crew van. You get some of the more useful trim like the headliner and rear door storage, you get a 3-person bench (and a vehicle rating as a passenger vehicle with 5 occupants), and windows in the rear doors, sliding door, and behind the driver.
Unless you’re planning on adding a pop-top, most people tend to choose the high roof van for conversions. It’s tall enough for most people to stand up straight inside. We wrote more about choosing a high or low roof van here. Only cargo variants are available as low roof.
Vehicle length is a hard decision. The 144″ wheelbase is Mercedes’ mid-length offering, but it’s the shortest one available in the USA. This van just about fits in most US parking spaces. Moving up to the 170″ wheelbase gives you just over 40″ more length inside but also a slightly wider turning circle and less parking opportunities. We’d say the 170 still handles remarkably well though, even though it has slightly more risk of high-centering on off-road trails.
The one big downside to the 170 is available conversion weight. The 2500 170 4×4 only has 2500 lbs payload capacity, whereas the 144 has 3500 lbs.
If you really really can’t get enough space in a 170, there’s also a 170 Extended, which adds almost an extra 16″ at the rear compared to the regular 170″ wheelbase version. It is an enormous vehicle. Don’t buy this if you have a steep driveway because the rear overhang is likely to catch on the ground.
2500 or 3500 is mainly a weight decision. If you think you’ll be doing a full conversion, using heavy materials, carrying lots of water and a grey and black tank, then the 3500 gives you more leeway. The 3500 also has a 7,500 lbs trailer hitch rating whereas the 2500 is limited to 5,000 lbs.
Engine choices
4CE 4 Cylinder Engine / 7-Speed Transmission
Around 5MPG more economical, a much smoother transmission, and still plenty of power for most situations. However, there is currently (mid-2017) a hold on ordering this engine in the USA. It appears that there is some issue with EPA certification.
6CE 6-Cylinder Engine / 5-Speed Transmission
We get around 18MPG with this engine in regular driving in a fully laden van. It has plenty of power. You aren’t going to be smoking the wheels pulling away from a standing start in a Sprinter van, but this engine will climb steep grades fully loaded with no issues.
Our 5-speed transmission used to need a lot of manual assistance to shift down on hills (you nudge the shift lever to the left to shift down, right to shift up) but since the last time ours was connected to a Mercedes computer, that’s all got a lot better. Either they reprogrammed the shift pattern, or they just reset it. It’s a “learning” transmission so my guess is if you drive it like a mad person while it’s learning, it’ll stay in a lower gear for longer.
The 6-cylinder engine gives you a slightly larger 220A alternator, if you’re thinking of using that as a charging source for house batteries.
Ordering options
Sprinters are designed for many different uses, so there are a lot of options. Some options can’t be installed if another one is already. Some options require other ones to be installed. For instance, the CL4 Multifunction Steering Wheel (the one with buttons on it) is only available in conjunction with the JK3 Pixel matrix display (dash with a screen in it).
That means you might end up having to order more options than you intended, just to get the stuff you wanted. Most of the time the configuration site and the printed documentation lets you know when this is the case, but sometimes it’s hard to keep track.
In other words, don’t be surprised if additional option codes appear on your order sheet than the ones you specifically added. It’s not necessarily the dealer trying to rip you off, it’s just how the system works.
The big packages
There are several option groupings available that pull the most common choices into one master code for easy ordering.
These packages make it easier for dealers to just check one box and get a set of common options that will probably sell pretty well. If you’re doing a van conversion, you won’t need some of the stuff the packages offer.
Mercedes has typically made those groupings slightly cheaper than ordering each item individually. However, if you only want certain parts of the grouping, it may still be a more expensive way to buy things.
Grab the Dealer Ordering Guide and follow along as we take you through some of the details of these packages.
C01 Driver Comfort Package
The biggest physical benefit of this package is moving to the SB1 and SB2 Comfort seats for driver and passenger. That means extra controls for lumbar support and seat angle. Still not very comfortable though ;-).
Another value of this package is the FZ9 Two additional master keys. Losing or breaking a key is an expensive proposition – much more expensive than the FZ9 option and maybe even more expensive than this whole package.
The FJ1 Hinged lid on the central dash storage compartment makes that space useful. Without it, anything you put there shines a reflection on to the windshield.
In our experience, the E46 12v outlet in the driver seat base is badly positioned. It’s too far forward to be useful in the rear of the van and it’s a trip hazard if you run a cable from this location up to any devices on the dash.
C02 Driver Efficiency Package
The E1N Becker Map Pilot nav system is serviceable but not wonderful. It’s a very expensive option for what it gives you. It will only work with the Audio 15 head unit. Given how terrible that stock audio system is, if you think you might ever swap the stereo out then don’t get this option.
The FR8 Rear view camera is nice, and can be made to work with aftermarket stereo head units. However, you can get it as a separate option. There are also cheaper aftermarket rear view cameras that replace the third brake light above the rear doors and look almost better than the factory version.
L16 Fog lamps look pretty cool and function well. Again, available separately.
MS1 Cruise Control is something you either can’t live without or may never use. We had to cut our Cruise Control stalk down to keep from accidentally activating it.
C03 Active Safety Plus Package
We ordered this package but never received it because our dishonest dealer sold the van out from under us. Although some people get annoyed with the JW5 Lane Keeping Assist, I think the overall set of safety features you get by buying this package is worthwhile.
JP2 Driving Assistance Package installs sensors around the van that let you know if things are in your blind spot or if you’re leaving your lane. Given the large potential blind spots in these vans, I’d say go for it.
JA5 Light and Rain Sensor sounds like nothing, but it lets you have automatic dimming headlights and automatic windshield wipers. The stock wiper control is pretty primitive, so this adds some pleasant luxury.
F68 Heated and electrically adjustable mirrors are almost essential if more than one person will be driving the van. We don’t have them and curse about it all the time.
The rest of this package is stuff you might end up getting as part of other packages anyway, or pretty pointless. Who really needs a Y10 Mercedes branded first aid kit or Y45 Mercedes branded flashlight? Overall though, the package cost is pretty competitive with the price of the useful individual items.
C04 Active Safety Plus with Parktronic
This package just adds Parktronic to the C03 package. Parktronic uses the sensors around the van to detect when you’re getting close to the car in front or behind you in a parking spot.
The backup camera is great for the rear view, and you can probably see pretty well where the front of the vehicle is going to end up, so this might not be a worthwhile option.
Worth mentioning – Parktronic won’t work too well if you’re carrying a bike rack on the rear hitch. It also gets disabled if you plug something in to the trailer wiring plug.
C05 Premium Appearance Package
You can get the RL5 Alloy wheels and the X13 Bi-xenon headlamps as separate options. If you like the look of the alloys then this package is better value than buying the items separately.
If you plan on using aftermarket wheels or you just want plain steel wheels, then just go for the headlamps on their own (package X13). We have the Bi-xenons and would recommend them over the regular lights. They are bright and provide wide, even illumination.
C06 Workspace Access Package (cargo van only)
This gives you the aux battery, assist handles, and a rear door step, plus some LED lights and a 12v outlet in the rear compartment. It’s an interesting package but if you get it you can’t also have the factory installed hitch because of the W73 rear door step.
C07 Cargo Protection Package (cargo van only)
Factory L-track mounted in the walls at waist (V42) and head (VC4) height, with hardboard panelling (VA3) between. You also get the T12 Two-stage sliding door opening and some overpriced YK3 cargo straps.
This is a really interesting package because the flanged L-track is basically the same as what we ended up adding to our walls. If you do the math, this option is more expensive than DIY but that’s only until you factor in your time, and templating the wall panels takes a LOT of time.
If you decide to buy a cargo rather than a crew van then this could be a good option. The one downside is that the L-track is pretty permanently mounted (we’ve heard they glue it in place along with mechanical fasteners).
C08 Cold Weather Package
The H01 and H04 insulation is a joke. If you’re planning on converting the van, the first thing you’d end up doing is tearing this thin insulation out to replace it with Thinsulate or some other proper insulation material.
H15/H16 Heated seats are nice, but it’s probably better to get them as separate options. We’ll talk about heater booster options later – basically, we’d use an aftermarket Espar heater rather than the Mercedes built-in one, unless the van will be used in sub-zero temperatures a lot of the time.
C09 Rear Passenger Comfort Package
This is air conditioning in the back of the vehicle, basically. If you’re doing a conversion it’s unlikely you need any of the other items in this package. The W73 rear door step is not compatible with a rear hitch. It’s probably more useful to just get the X11 Air conditioning package on its own.
Other packages
These are still combinations of items, but its the combinations that you have to buy together in order for them to work properly.
X01 Suspension Seating Package (no longer available)
Ah, let’s all take a moment to mourn the loss of this package. Seats that actually absorb road bumps well, at a great price. But no longer available because the seats now have to have airbags installed.
We ended up spending too much money buying aftermarket seats just to get something like this option.
X04 Multi-function Wheel/Display Package
The “highline” display that this package gives you still looks pretty old school, but it’s more informative than the regular dash display and makes it easier to set vehicle options because you can use the steering wheel buttons to navigate through menus.
It also lets you control some aspects of the stereo from the steering wheel. If you install an aftermarket stereo there are magic boxes that will hook the steering wheel controls up still.
X06 High Idle Fixed Package/ X07 High Idle Variable Package
They do what they say on the tin. If you want to use an engine-based alternator to recharge your house batteries, this is one way to do it while you are parked up.
There’s lots of discussion about whether these vans should be idled or not, and whether high idle is different to regular idle. Some people say it is really bad for the engine. Other people say Mercedes offers the option, so why not use it?
X11 High Performance Air Conditioning Package
This is the alternative to getting the C09 Rear Comfort Package described above.
Remember that you can’t run the air conditioning with the engine off. Unlike some aftermarket RV units, there’s no way to plug in and run it from campsite shore power. Depending on your potential usage scenarios, that might be a big consideration for you.
X13 Lighting Package
If you don’t want alloy wheels, this package is the way to get Bi-xenon headlights. If you do want alloy wheels, it’s cheaper to use the C05 package.
X22 Trailer Hitch Package
Most conversion vans end up using the hitch for something – either for carrying bikes, or even just for slotting in a small access step. This option is cheaper than some aftermarket ones, comes with factory-approved wiring, and works well. The only complaint we have is the location of the wiring socket on the rear of the hitch, where it interferes with hitch lock pins.
X24 Crew Cab Package (cargo van only)
This option turns your cargo into a crew. I’ve not tried this but it might be a sneaky way to order cargo-only items, and then throw the X24 on top. I’m guessing Mercedes is wise to that trick, though.
X25 Rear Window Package (cargo van only)
If you get a cargo van with the intention of adding windows later, you should know that the windows in the rear doors are not an easy aftermarket installation.
If you are sure that you want rear windows that look factory, it’s probably worth getting this package because it costs less than $200 and you would pay way more than this to get suitable windows installed.
We bought a crew van with rear windows already installed, but we hardly ever remove the window shades from the inside these days. The rear windows are only marginally useful as a driving aid, especially when you have a platform bed obscuring most of the area. They are also an uninsulated area right next to where you are sleeping.
X26 Spare Tire Deletion Package
This gets rid of the spare tire carrier under the rear of the vehicle and the spare wheel/tire they provide to go in it.
Even if you’re planning on using this space for batteries, water tanks, or whatever, why would you delete this option? The carrier is easy to remove, and you end up with a spare wheel for just over $100.
X27 Additional Battery Package
Ah, this one is contentious. We’ve already described why the Mercedes Aux battery isn’t the best thing to use for your van conversion. It’s tempting to get it anyway because it comes with some wiring and a relay, and a platform you can use to put other batteries under the hood. It’s really up to you, depending on the type of house batteries you intend to use.
X29 High Range 4×4 / X30 Low & High Range 4×4
Only available on the V6 engine (which appears to be the only choice at the moment anyway). If you’re going 4×4, why not get the X30 that adds low range for an extra couple of hundred dollars?
The Sprinter 4×4 system is not the same as in most passenger vehicles. Know what you are getting before you order it. We think it’s worthwhile, but a lot will depend on where you plan on driving.
We’ve found that the van is still very well behaved off road and in packed snow even in 2WD mode. 4×4 gives us more confidence when we’re traveling in foul weather and exploring the type of forest roads that get narrower and bumpier the further along them you drive.
ZH4 Downhill Speed Regulation for 4×4
Adds a type of cruise control for low speed control when you are in 4×4 low range. The van maintains a low speed on descents using engine braking rather than you having to constantly use the brakes. It requires MS1 Cruise Control. It’s a $50 option, so if you’re already getting cruise control why not add it?
Individual options of interest to converters
Now we get down into the weeds. There’s a long list of available options. You can spend ages looking through them and coming up with different combinations. In the end though, you need to think about what you’re trying to achieve with your vehicle, and whether it’s better to do that with an option from the factory or something you add yourself later.
Here are some of the most likely candidates for a conversion van.
D13 Mounting rails for roof rack
Get these! If you have any plans at all for adding solar panels, an awning, or a roof rack to your vehicle, these rails make it much easier. You can buy them after the fact from Mercedes, and you can buy an aftermarket system from Vantech (which doesn’t fit the Fiamma awning system), but why not get them installed at the factory?
E40 Trailer hitch prep wiring
Given the cost of this ($123 in 2016) why not get the whole package with the X22 Factory installed hitch instead for $360?
If you do insist on adding your own hitch (some aftermarket ones will fit on vans with rear steps), do yourself a favor and get the wiring harness. It gives you a fused, relay-driven harness rather than trying to splice in to tail lights. The Sprinter hates when you splice into its lights.
ED5 Parametric special Module (PSM)
The PSM gives you a way to add extra electronics that are triggered by events the van knows about. At its simplest, this could be things like when the doors are open, switch on a light. More complex sets of inputs and outputs are also possible.
Lots of folks get super-excited about this option, but remember that Mercedes won’t officially let you program the PSM yourself, nor is it likely they’ll do the job for you. You need to purchase a STAR system clone from China and learn to use Mercedes’ programming tools before you can make the PSM work. A couple of hardy souls on the Sprinter-Source forum have done this. Unless you’re familiar with close-to-hardware level coding and electrical engineering, you might want to leave this option alone.
ER0 Pre-installation for radio (option mostly removed in 2018)
This initially sounds like a great way to save money if you’re planning to replace the Audio 15 and stock speakers as soon as you get the vehicle (and we’ll be in that camp with any future Sprinter purchase). But, it’s not quite that simple. The pre-install cable connector has a slightly different pin-out configuration than the Audio 15 unit. There’s no steering wheel button integration either.
Now, it’s not the end of the world. There’s another place to hook into the CAN bus in the dash area that should work with the METRA black box we hooked up for steering wheel controls. There’s also a METRA harness adaptor for this pre-install connector. It’s more hassle than just throwing out the Audio 15, but the $380 you save will buy you a nice new head unit.
Update: In 2018 the rear view camera is standard equipment, so the Audio 15 radio has to be installed to act as a display. This option may still be available on some cargo models.
EV6 Pre-installation Becker Map Pilot navigation system
Often you’ll find Map Pilot control units on sale on the Sprinter forum or eBay. You might think it’s worth buying one, getting the van with the nav wiring installed, and then plugging it in. You’ll save some money that way but not much, and you’ll often end up with a used unit, so no free map update for you.
Plus, why are people selling the control units? Probably because they ripped out their stock stereos in disgust.
F01 Swivel Seat Package (3500 cargo van only, fleet only)
You can still get the factory swivel seats (which are very smooth), but only on a 3500 cargo van, and only through a dealer who can do fleet orders. Is this reason enough to choose cargo over crew? That’s up to you.
The package isn’t a bad price considering it gets you the low seat bases, the two swivels, and the comfort seat upgrade along with the folding handbrake lever, which makes it much easier to rotate the driver side chair.
Your only other option at this time is to order low seat bases (and the folding brake lever if you want it) from Mercedes and install your own aftermarket swivels. We did that, and it’s not hard.
FJ1 Hinged lid for storage compartment
If you don’t get the C01 package, at least get this. The central dash storage compartment is almost useless without the lid due to glare on the windshield from anything you put in this area. The lid also protects any contents from prying eyes.
FR7 Pre-wiring, rear view camera (option mostly removed in 2018)
Some folks think this is a good way to save some money on a rear-view camera install. That’s not necessarily the case. The pre-wiring comes with FAKRA ends for the video source, whereas most aftermarket cameras use RCA. So you’ll have to buy an adapter. The pre-wiring comes with a 6-pin socket that contains power and some other mystery cables, so you’ll have to do some testing and splicing to work out which you actually need for the camera power.
In the end, you are probably better off using whatever cable comes with the aftermarket camera you buy. It’s easy enough to fish it along the top of the headliner if you have one installed, then down the A pillar to the dash. If you’re taking the headliner out to insulate and add a roof fan, things get even simpler. Save your money.
Update: In 2018 the rear view camera is standard equipment, so the Audio 15 radio has to be installed to act as a display. This option may still be available on some cargo models.
FY1 Security alarm with interior motion sensor
We have this on the van we ended up with. It’s OK. It doesn’t go off for no reason, and it does go off if there’s motion inside the vehicle while it’s armed.
If you’re planning in camping in the van though, it is one more thing to remember before you go to sleep each night. You can’t just click the key fob to lock the doors. You have to hit a button on the overhead console above the dash to disable the motion sensors first. You guessed it – that’s how we know it goes off if there’s motion inside the vehicle.
Back when we had a dog, we actually disabled the motion sensors using black electrical tape so the dog could stay in the locked van.
FZ9 Keys, two additional masters
Losing or breaking a key is an expensive proposition – much more expensive than the FZ9 option. We’d suggest getting it just for peace of mind.
H01/ H04 Heat insulation, rear/ front compartment
You can spend $300 on these two options and be disappointed, or you can save your money and spend it on a proper insulation solution like Thinsulate.
H15/ H16 Heated front passenger/ driver’s seat
This is entirely a personal preference option. Living in the Pacific NorthWest it was high on our list.
H12, HZ5, HZ9 Fuel-fired pre-heater/booster (17,000 BTU/34,000 BTU)
Because the diesel engine is so efficient, it doesn’t heat up much until you’ve been driving for a while. That has two consequences. First, in very cold temperatures the oil viscosity might be too high, so the engine might not be as lubricated as it likes. Second, the cab heater uses waste heat from the engine coolant, so although there’s an electric element built in too, it’ll take longer for the vehicle interior to heat up.
That’s why Mercedes offers three heaters that burn diesel from the fuel tank to warm either the engine, the van interior, or both. All three options are based on an Espar D5 hydronic (water-based) heater.
- H12 Fuel fired pre-heater booster outputs 17,000 BTU and runs to the engine block. Once that has heated up sufficiently, the dash heater fan turns on to blow warm air (from the coolant transfer unit) into the vehicle.
- HZ9 Fuel fired heater booster without pre-heat is a cheaper option that outputs 17,000 BTU but, like the name says, it doesn’t have the pre-heat option of H12. It doesn’t pre-heat the coolant circuit in the engine block. It only runs while the engine is on in order to help heat the vehicle interior.
- HZ5 Heavy-duty fuel-fired pre-heater/booster is two units, each outputting 17,000 BTU. One heats the coolant circuit. The other heats the interior. Basically it’s the HZ9 and the H12 combined.
There’s an available HY1 Remote control for auxiliary heater, which lets you turn the H12 heater on for a while before you intend to start the vehicle. That gets the engine block nice and warm before you start up.
You can also add H13 Rear cabin heater and vents to heat the cabin area. This is just a heat exchanger, not the diesel fired unit.
Although this all sounds impressive, there are some issues. The heaters will only come on when the outside temperature is lower than 4 degrees Centigrade (39 Fahrenheit), and they will run for a maximum of 60 correction: 120 minutes – often less, because it depends on the ambient temperature.
The heaters are supposed to be “exercised” once a month, but that’s hard to do if they won’t turn on in temperatures over 39 F. You can wire in a switch to a circuit with a fixed resistance to defeat the temperature lockout.
The engine heaters are only really necessary if you frequently keep the van in very, very cold temperatures.
All of the factory heater options are made by Eberspacher. Mercedes adds another level of control on top. Rather than using Eberspacher’s controllers, Mercedes interfaces with the units through an addition to the CAN network. That means you can control the heater from the dash panel but it also means you don’t get the functionality that Eberspacher offers on their controllers.
People on the forum have complained that some dealers can’t/won’t service the (factory) heaters, even claiming that they aren’t OEM parts. Others have had no issues with servicing.
This is a thousand dollar plus option. With the rear heater vents, you’re looking at over $1500. It’s much cheaper to buy an aftermarket Eberspacher (“Espar D2”) diesel forced air heater and install it in the vehicle. That unit will run at any ambient temperature and for as long as you want. However, it won’t pre-heat the engine block for you.
If you were planning on adding a hydronic (water-based) Eberspacher heater (the D5) to your build then this factory option *might* be more appealing. We considered this. Getting H12 and H13 runs engine coolant plumbing back to the area behind the driver’s seat. You can then use a calorifier (a water heater like the ones made by Isotemp) to turn that engine heat into hot water for use in the vehicle. You can also run pipes for radiant heat under the floor. If you really want to pursue that option, H88 Rear Heater Prep is probably a better (cheaper) way to go than H13. That option runs coolant hoses to behind the rear seat ready for you to use.
In the end, we decided that hydronic heat was too expensive and too much hassle for the use we might get out of it. Most often we want quick cabin heat rather than the slower cabin and hot water heat that the D5 provides.
Regardless of whether you get a factory heater or add your own, you might want J51 Fuel gauge, optimized for aux. fuel tap. The regular vehicle fuel gauge doesn’t show actual fuel level but instead uses a calculation of what’s been consumed by the engine. Using a diesel heater means the fuel gauge will be inaccurate. The J51 option means that the vehicle takes heater usage into account by just reading fuel level in the tank. It’s not clear, but we think that this is just a reprogramming thing rather than specific hardware.
L16 Fog lamps
These are surprisingly useful in snow storms when the main beams reflect back too much light. They also look kind of cool! Retrofitting fog lamps is not an easy task because Mercedes only provides wiring for the options you specify.
We now run 3M protective tape on ours after cracking one on some random road debris that got flung up at the van.
L63 Ceiling lights rear compartment, LED (cargo van only)
If you think you can repurpose these for your build, then it might just be worth getting them, but they are an expensive option that you will probably have to re-work to make them fit into your overall conversion plan. They’ll also be running of the starter battery rather than your house battery, so probably not the best use of money.
LD0 Overhead control panel with 2 reading lights
There are a couple of different overhead console options. The base van has no overhead console. LD0 gives you lights that might be useful for map reading.
If you get the FY1 Alarm system, that adds extra buttons and a motion sensor in this space. You don’t have to order LD0 in that instance.
There’s also an FF8 Overhead storage slot, which is a cut-out above the reading lights,. It provides a DIN sized slot and power, so that you can mount a CB radio or similar.
MS1 Cruise Control
As we mentioned before, either you can’t live without cruise control or you don’t care too much. Cruise control works just fine in a Sprinter, but there’s an issue with accidental engagements. The MB cruise control arm sticks out just above the turn signal stalk. We were hitting it when we meant to operate the turn signals, which was dangerous. We trimmed it down to stop that from happening.
N62 Front engine bracket for additional alternator
If you know for sure that you will be adding a second alternator to charge your house battery, this might be a good option. It comes with the idler pulley and belt tensioner. At over $400 though, check with the supplier you’re using for the alternator to see if they don’t have a better deal.
SB1/ SB2 Comfort drivers’/ passenger seat
If you don’t get the C01 Comfort Package, and you plan on keeping the stock seats, then do yourself a favor and upgrade to these more adjustable versions.
SZ7/ SZ8 Storage net, driver/ passenger seat backrest
These are pretty nice OEM elastic nets that fit on the plastic at the back of the cab seats. They look like they were designed to be there, rather than being hooked on like most aftermarket ones are.
We decided against getting these but in retrospect the easily accessible storage space would have been nice. Be careful though – if you’re thinking of fitting seat swivels later, stuffing things into this location might make it harder to turn the seats round to face the interior of the vehicle.
T12 Sliding door two stage opening
This option gives you a “stop” in the sliding door when it’s about half way open. It’s ideal for conversion vans because it means you can open the door just enough to get in and out without letting all the heat out from inside. If you planning to mount a cabinet in the sliding door area, you can design it so that the cabinet extends just as far forward as the half-open door.
The mechanism that MB uses sticks out inside the van above the sliding door. When we came to put trim on the interior of the van, this mechanism was just in the way. We found a solution made by another Sprinter owner that works just as well, costs less, and lets you customize exactly how far you want the door to open before it pauses.
T57 Electric sliding step
It’s a long way up into the 4×4 van. The T57 electric step gives you a half-way point between the ground and the sliding door entry area.
Given the price is nearly one thousand dollars, we’d fit an aftermarket step instead of this one. That way, you have access to the passenger door as well as the sliding door. We chose the AMP Power Step and it’s worked well for us. It tucks up under the van when it’s not in use, and provides a stable platform when it’s extended.
T74 Assist handle, sliding door
A helpful handle to get in to the sliding door, mounted on the rear edge of the B pillar. You can make your own aftermarket one, but the OEM price is pretty good.
T75 Door-mounted assist handles, driver and passenger
These handles come standard on the 4×4. We have them on our van, and we don’t use them. The doors are deep, and the handles are high up. If you’re climbing in to the van it’s possible you won’t be able to reach them easily. However, it’s cheaper to specify them as part of the build than to buy them aftermarket later. Your call.
T85/ T86 Assist handle, left/ right rear door
These tubular metal handles are really helpful for hauling yourself into the rear of the van. We bought one aftermarket for the same price. We don’t use it any more because our platform bed interferes with the location where the handle is bolted on. We added flexible handles instead.
V36 Roof trim (cargo van only)
This is the headliner that you get in the crew and passenger vans. It’s a very expensive option considering that you can often find people begging you to take theirs away on the Sprinter forum.
X90/ X93 Deletion of Sprinter/ Bluetec badge, rear door
A free option. This removes the chromed plastic branding from the back doors of the van. It’s meant for businesses who’ll be wrapping the van in vinyl, but it also provides a cleaner look.
Have fun choosing options!
There are more options than we’ve listed here. Most are ones you either won’t care about, or that come as stock on most vans. As with most things in life, you’ll be making a cost/benefit trade-off with each of these options. You’ll probably also be comparing them to the cost of your own DIY or aftermarket alternative.
Also, don’t sweat the small stuff. In the end, you’re getting a new van and it will be awesome. We didn’t get the van we ordered, and although we’re still pissed about that situation we’re enjoying the van we ended up with despite the difference in options that came from the factory.
This is very helpful! I’d love an updated version for the 2019 models!
Ben, I’ve not seen a good breakdown of the new list yet. Once I have one, I’ll do that. Many of the options outside the driver cab area will be the same as before.
Love your post. very informative. We found this in July 2022. Have you done one for the 2021-2022 model? Any thing you could send us as a guide would be great. Thanks from Toronto, Canada
We keep meaning to update this for the newer vehicles, but haven’t got round to it yet. Many of the options are still available, or only slightly changed. You can actually learn quite a lot about the options by configuring a van on the Mercedes site.
This has been the best resource for ordering a Sprinter. REALLY appreciate it. We own a ’17 Sprinter and have ’19 on its way. I’m still confused as to the best heating option for us in-between users. We use the van as our normal commuter, so we don’t have a lot of conversion, aside from the insulation we will be installing. We only sleep in our van 5-10 times a year. We live in Utah so it gets cold. I have the H12 engine pre-heater booster on my ’19. What’s the best way to heat the cabin at night without having to wake up the kids by turning on the engine? We sleep in sleeping bags so it doesn’t need to be extremely warm, more looking for some heat and convenience. Thanks for your help!
David, the engine pre-heater booster is designed to keep the engine warm, not you. The other factory options for supplemental cabin heating are limited in how long they’ll run without the engine on.
The best way to stay warm in the van is an aftermarket Espar diesel heater. It will run continuously overnight. It will never leave you without fuel, because it cuts out before the tank is empty. It’s highly efficient too.
Failing that, many people use propane heaters but those worry me for several reasons – the amount of condensation, the potential for carbon monoxide poisoning, and the safety risks of a flame inside the vehicle. The Espar performs its combustion outside the vehicle (well, inside, but in a unit that is sealed from the rest of the inside).
The other benefit of the Espar is that you can use it while you are driving to heat the passenger area of the vehicle. That means you’ll get way more than just the 5-10 nights use from it.
One more related question: What’s the easiest way to do the same thing in the summer with air conditioning? We don’t have a full camper conversion, but will be removing the paneling and adding in some extras, just looking for the most efficient way to cool down the cabin at night when the family is sleeping without having to get up, crawl over kids, and turn on the engine. Thanks again
David, air conditioning is more difficult than heating. There are very few options other than the factory air conditioning unless you’re prepared to get very DIY. And the factory AC will only work with the engine running. If you think you’ll always be camping at sites with a hookup then there are aftermarket AC units that will work when you’re plugged in, but we have no experience with those.
What we tend to do is use fly screens so that we can keep the sliding and rear doors open overnight, plan to sleep at higher elevations so it’s cooler, and just avoid areas that are high temperature (and especially high humidity) during those times of the year.
Very valuable. I have a 2017 Roadtrek Agile short Sprinter I am selling it and plan to order a 2020 Sprinter 170 4×4 for conversion. Is there an update for the Sprinters made in Charleston, SC?
Wade, we’re planning on adding an update for the new options from 2019+, but they are mostly in the cab area associated with the new trim levels and dash/entertainment system. Not all new US Sprinters will be made in SC. Many of them will still be imported from Germany. However, the manufacturing location makes no difference to the available options.
Many of the Option codes are different on the 2018 chassis. MT4 is the “Electronic engine speed governor, variable:. X06 and X07 are not listed. Also, ZG3 is the “Engageable all-wheel drive with gear reduction”.
Thanks! I’ve got to update this list for the new (2019+) models. I’ll get round to that some time soon…
sometime!
Awesome resource!! Thank you for posting. For VA5 Full Paneling, Hinged rear doors – on a passanger van would this still have windows?
There are certain mutually exclusive options. If you start with a passenger van, I imagine it wouldn’t be possible to select full panelling for the rear doors, because it just doesn’t make sense. Of course it’s always possible that the ordering system is smart enough to delete the windows in this case, but I wouldn’t bet on it.
Passenger vans come with (relatively) full interior trim already, with trim around the windows in the rear doors. There might be other ways to delete the rear windows if that’s what you’re aiming for. You’d have to work with the ordering system (or your dealer) to see what combinations were possible.